1.5.4 Preview a Problem Set
Follow these steps to preview any Problem Set in EdisonOS as a student would experience it.
What is Preview?
The Preview feature lets you experience a Problem Set exactly as your students will, including the full test interface, timing, and a sample performance report at the end without creating any attempt records or deducting credits.
Note:
By default, EdisonOS will display content from the EdisonOS Library. If you want to preview Problem Sets you have created yourself, make sure to switch to My Library to see your own content.
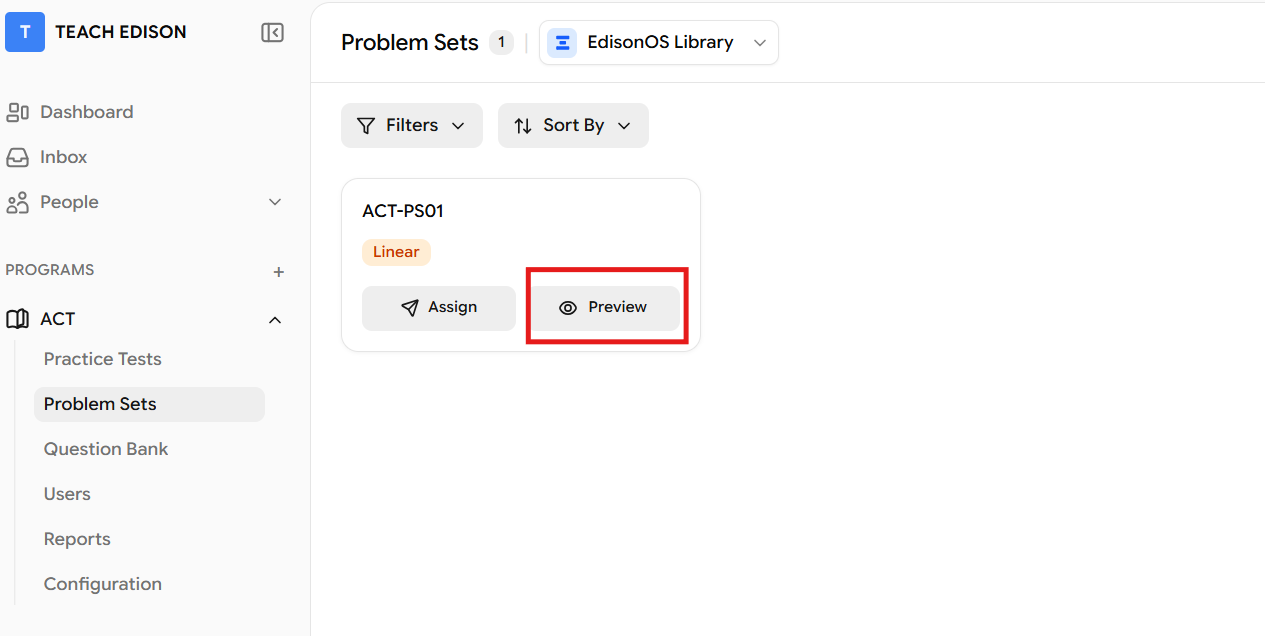
Step 1: Open the Problem Set
From the sidebar, navigate to your Program (e.g., SAT, ACT).
Click on Problem Sets in the left navigation.
Locate the Problem Set you want to preview, then click the Preview button next to it.
Step 2: Review the Preview Confirmation
A screen titled "You're about to preview this Problem Set" will appear. This confirms what preview mode does and does not do:
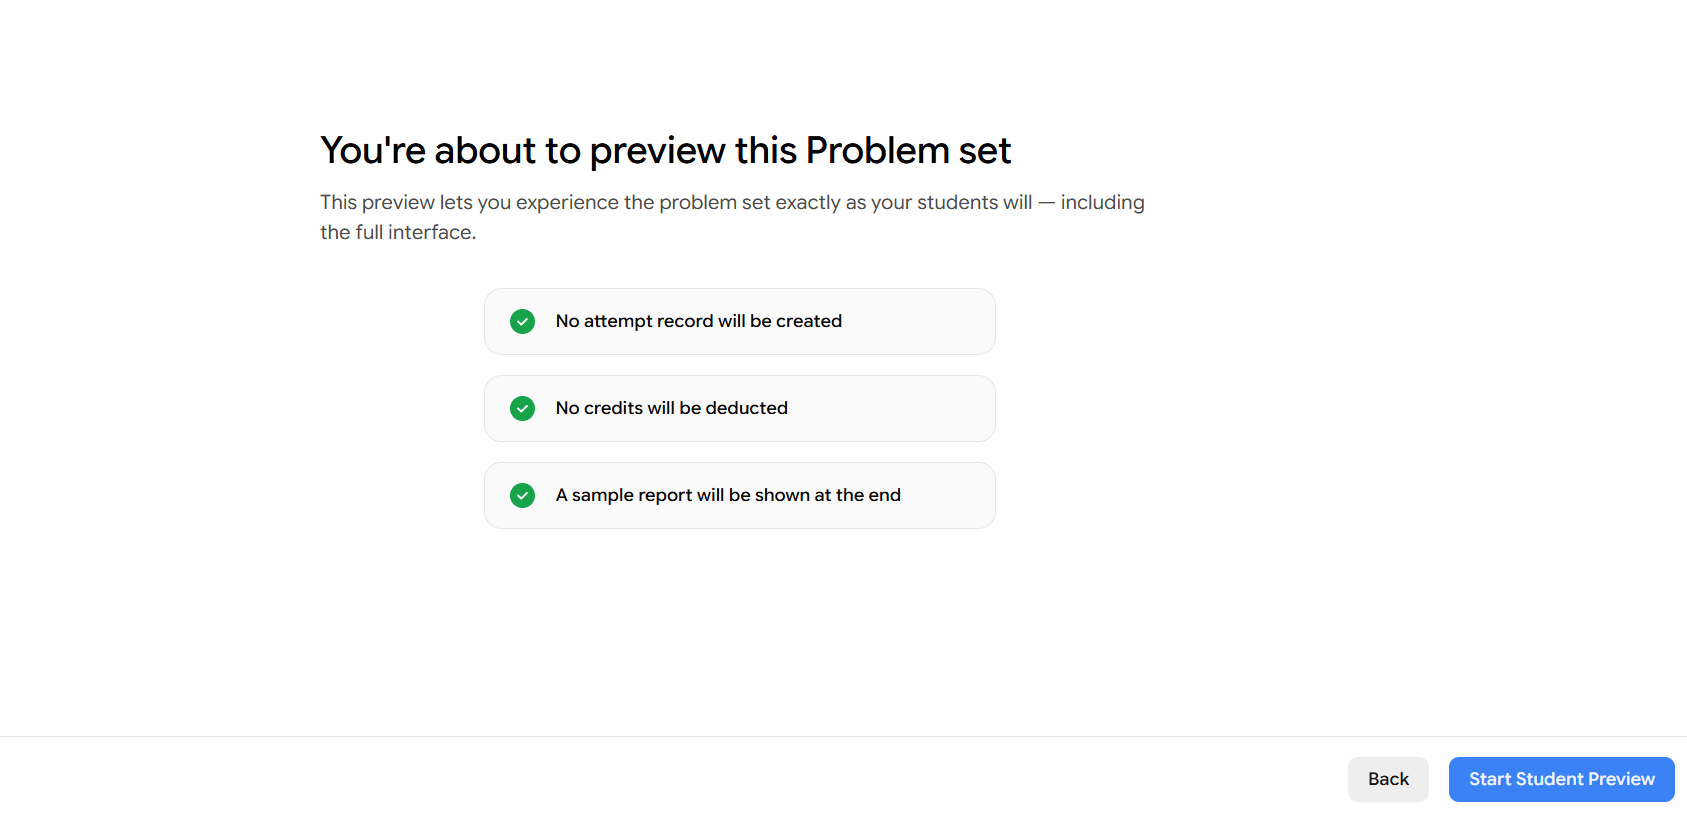
Once you've reviewed these details, click Start Student Preview in the bottom-right corner.
Changed your mind? Click Back to return to the Problem Set page.
Step 3: System & Network Check
After clicking Start Student Preview, EdisonOS runs an automatic system and network check. This is the same check your students go through before beginning any test.
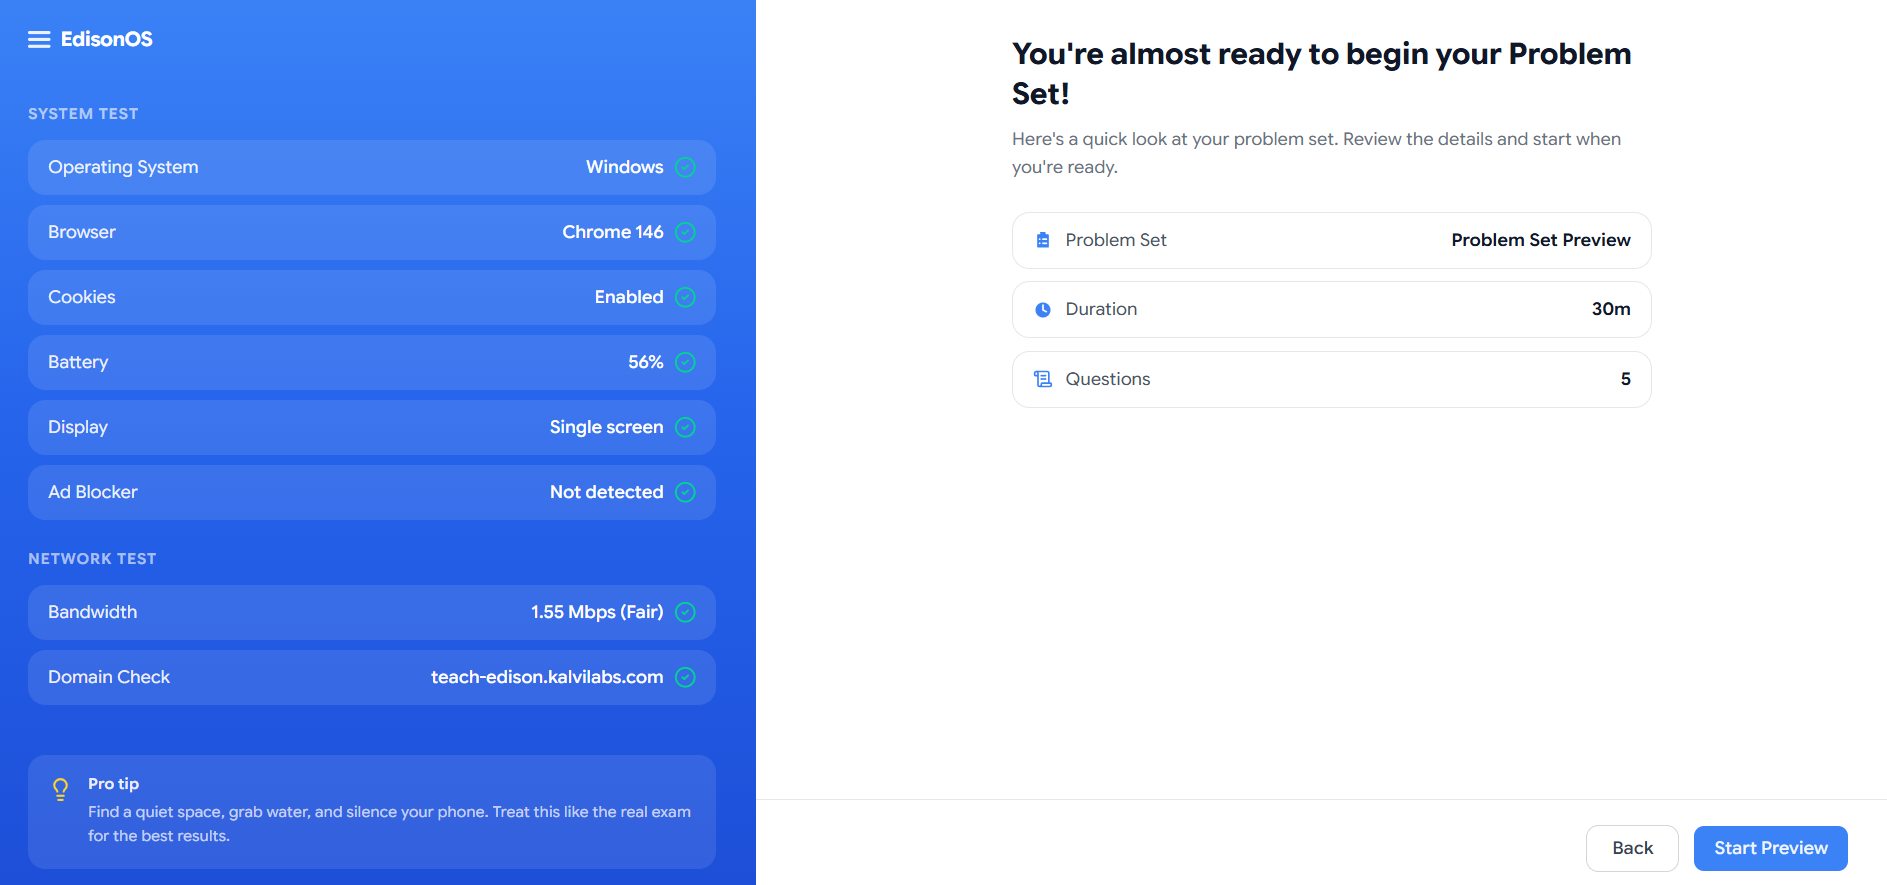
The left panel will display results across two categories:
System Test
Operating System
Browser
Cookies
Battery level
Display (single or multi-screen)
Ad Blocker detection
Network Test
Bandwidth speed and quality rating
Domain connectivity check
All items will show a green checkmark ✅ once they pass.
Mandatory checks: Some checks must pass before the test can start. If any of these fail, the student won't be able to begin:
Battery — must be at 20% or higher, or charging. Below 20% and not charging → fails.
Display — must be a single screen. Multi-screen → fails.
Bandwidth — low bandwidth → fails.
The right panel shows a summary of the Problem Set you are about to preview:
Detail | What it shows |
|---|---|
Problem Set | Name of the set being previewed |
Duration | Total time allowed (e.g., 30 minutes) |
Questions | Total number of questions in the set |
When you are ready, click Start Preview in the bottom-right corner.
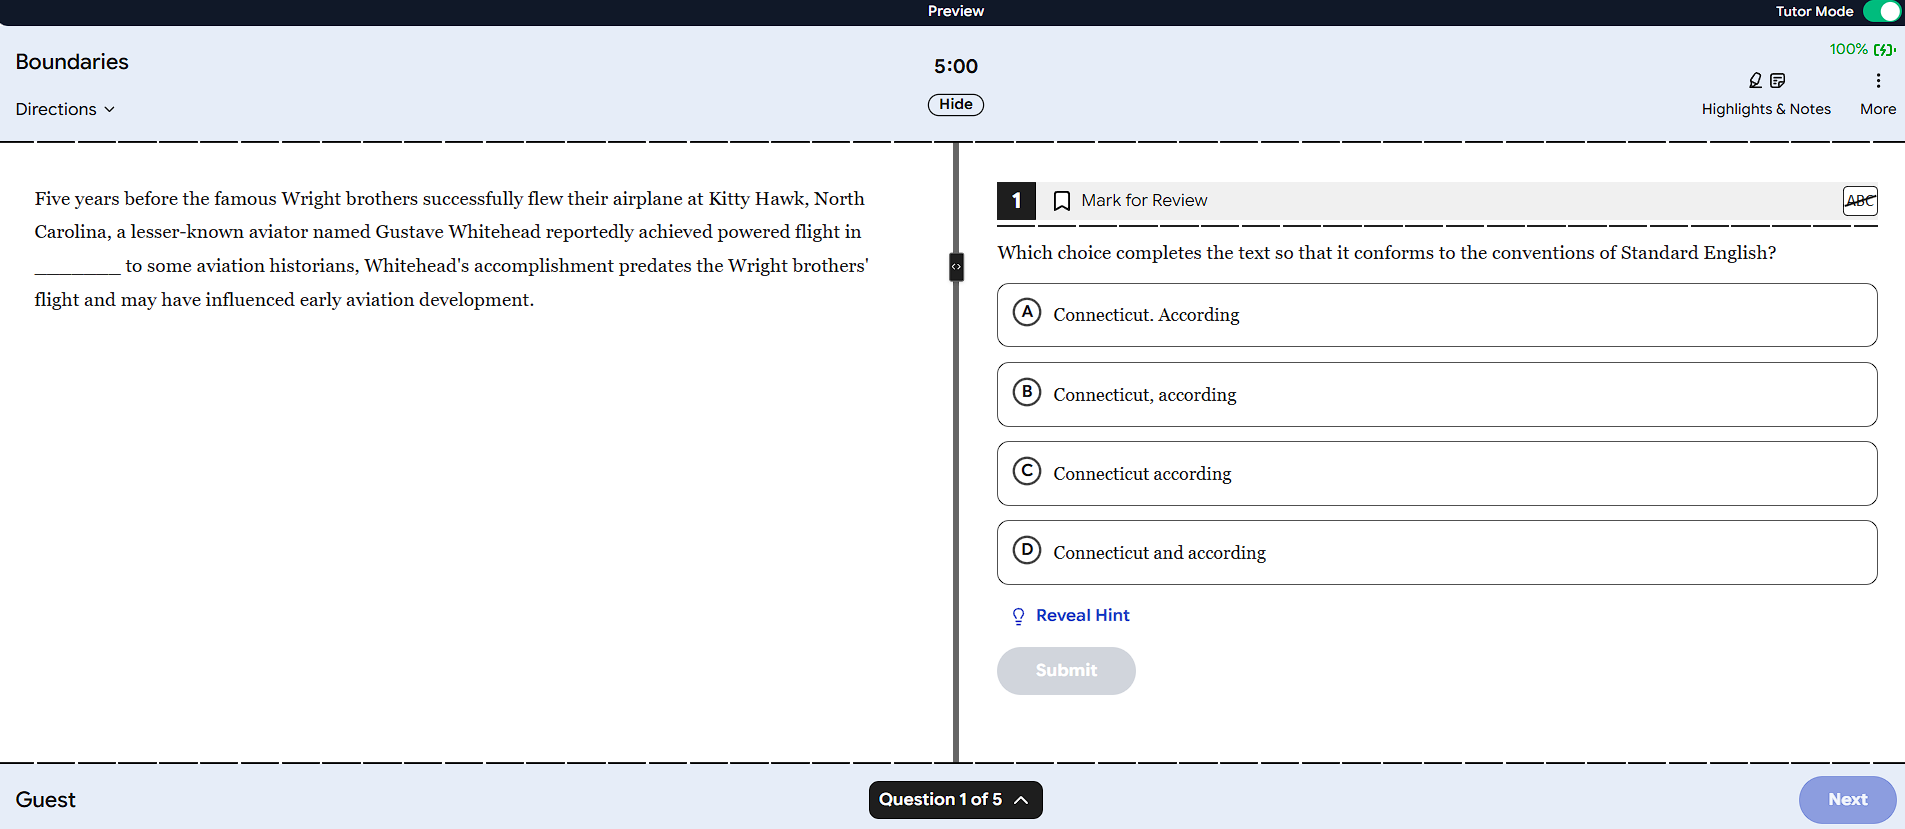
Step 4: Answer the Questions
The full student-facing test interface will now launch. You will experience the Problem Set exactly as a student would.
In preview mode, you can:
View the same questions students will receive.
Select answers.
Navigate between questions.
Use all available test tools and utilities.
Experience the complete exam workflow, including module transitions and breaks.
Work through the questions as your students would to get a true sense of the experience.
Tutor Mode
At the top-right of the preview, you can switch Tutor Mode on. When toggled on, it turns the test into a guided learning experience:
Guided learning with hints and step-by-step explanations.
With Tutor Mode on, each question shows a Reveal Hint option beneath the answer choices, along with a Submit button so learners get feedback as they go.
Step 5: End the Test
When you are ready to finish (either after answering all questions or at any point), click End Test in the top-right corner.
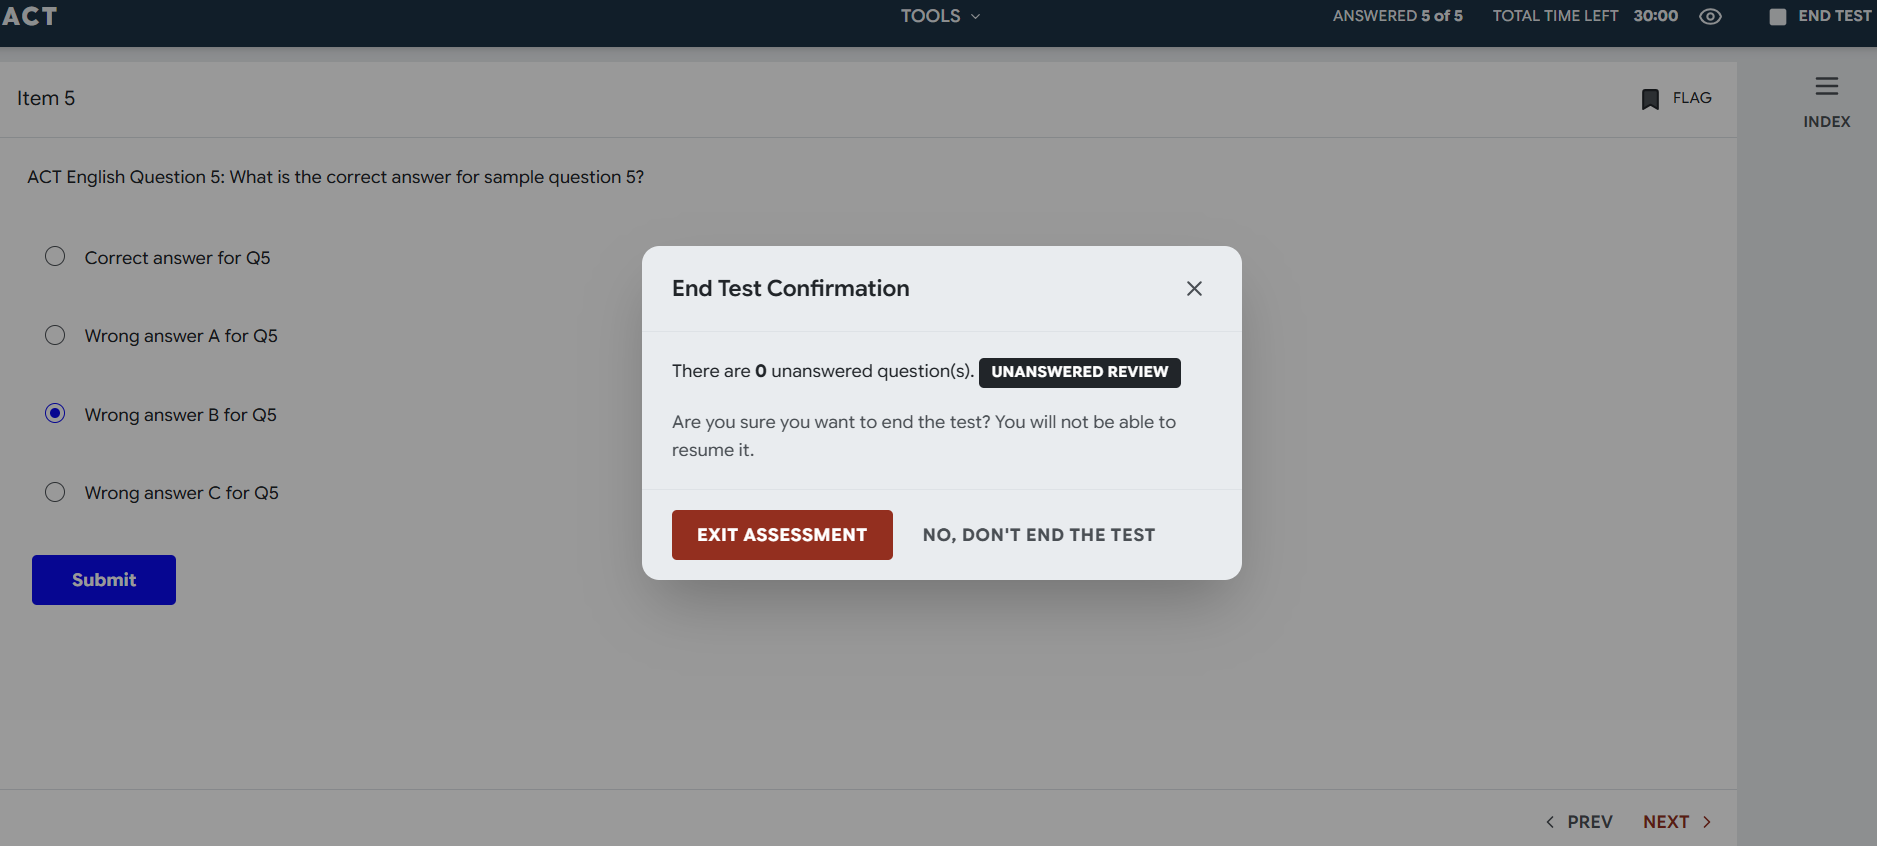
An End Test Confirmation dialog will appear:
It shows the number of unanswered questions remaining (e.g., "There are 0 unanswered question(s)").
You can click Unanswered Review to go back and review any skipped questions before submitting.
Click Exit Assessment to confirm and submit the preview.
Click No, Don't End the Test to return to the test and continue answering.
Once you click Exit Assessment, you will not be able to resume the test.
Step 6: Review the Sample Report
After submitting, EdisonOS will automatically display the Preview Report (Sample), the same report your students receive at the end of a Problem Set.
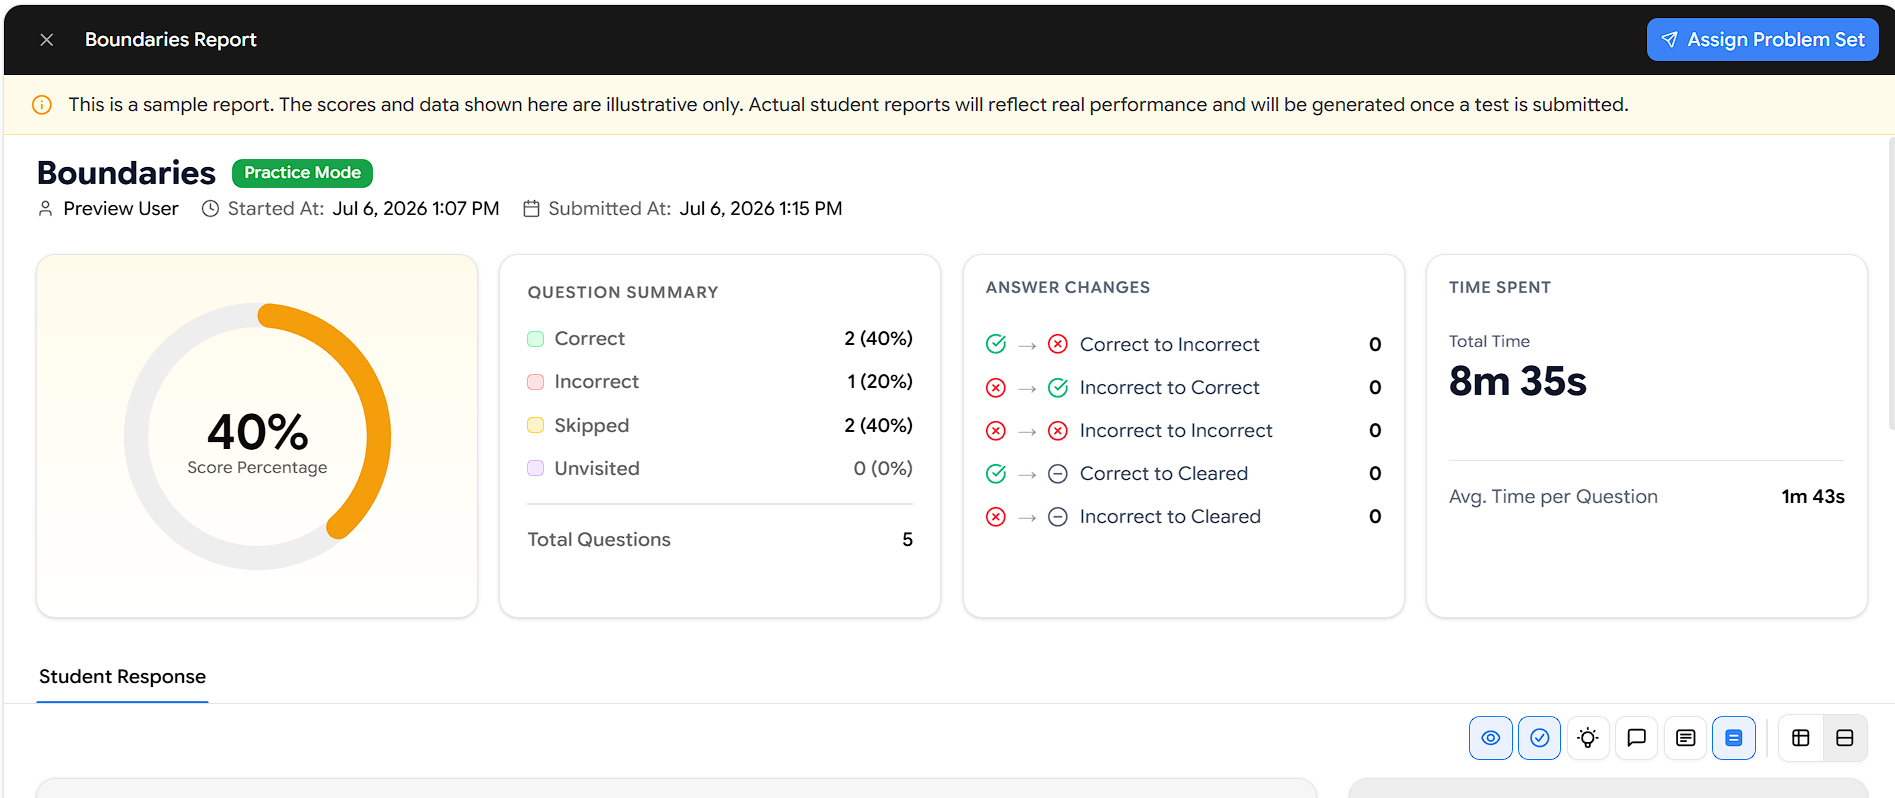
Performance Summary
Metric | What it shows |
|---|---|
Accuracy | Overall score shown as a percentage (e.g., 80%) with a circular progress indicator |
Question Summary | Breakdown of Total Questions, Correct, Incorrect, Skipped, and Missed |
Answer Changes | Tracks how often answers were changed Correct to Incorrect, Incorrect to Correct, and so on |
Time Spent | Total time taken and average time per question |
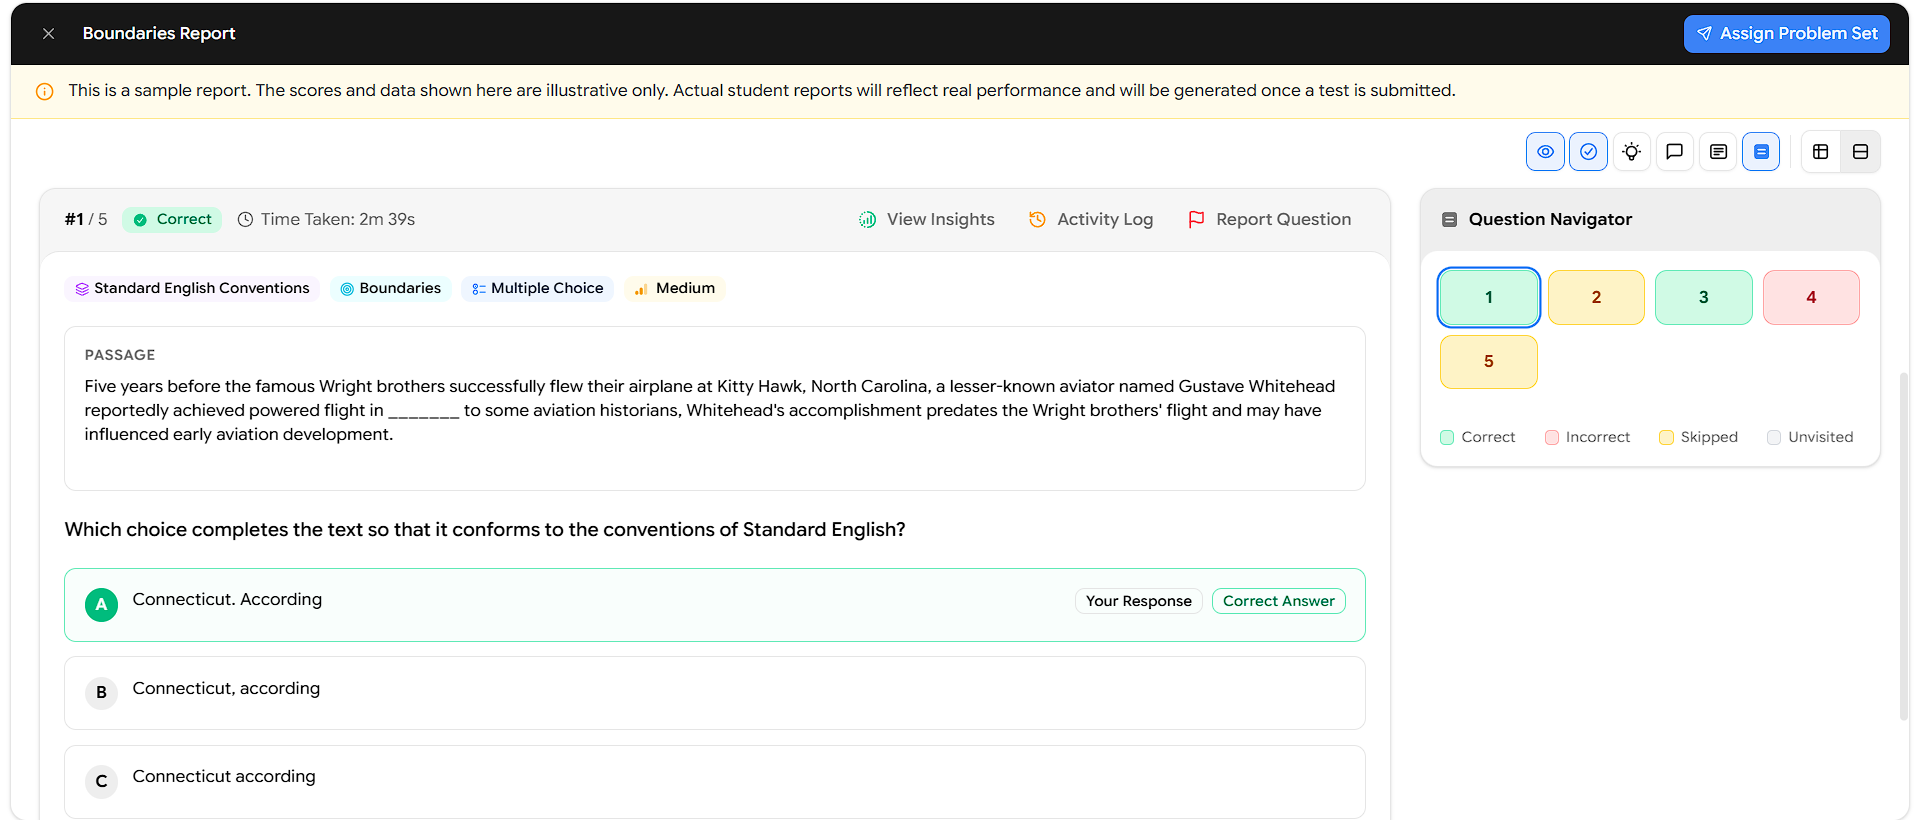
Student Response (Question-by-Question Breakdown)
Below the summary, the Student Response section shows each question in full detail replacing the earlier simple table. For every question you can see:
The question number and status and the Time Taken.
Tags for the question's Skill, Domain, Type, and Difficulty.
The full passage and question text.
All answer options, with the student's pick marked Your Response and the right one marked Correct Answer.
Quick actions: View Insights, Activity Log, and Report Question.
A Question Navigator panel on the right color-codes every question as Correct, Incorrect, Skipped, or Unvisited, so you can jump straight to any one.
Step 7: Return to Problem Sets
Once you've finished reviewing the sample report, close it using the X (close) button in the top-left corner of the report screen. This takes you back to the Problem Sets list, where you can preview additional Problem Sets before assigning them to students.
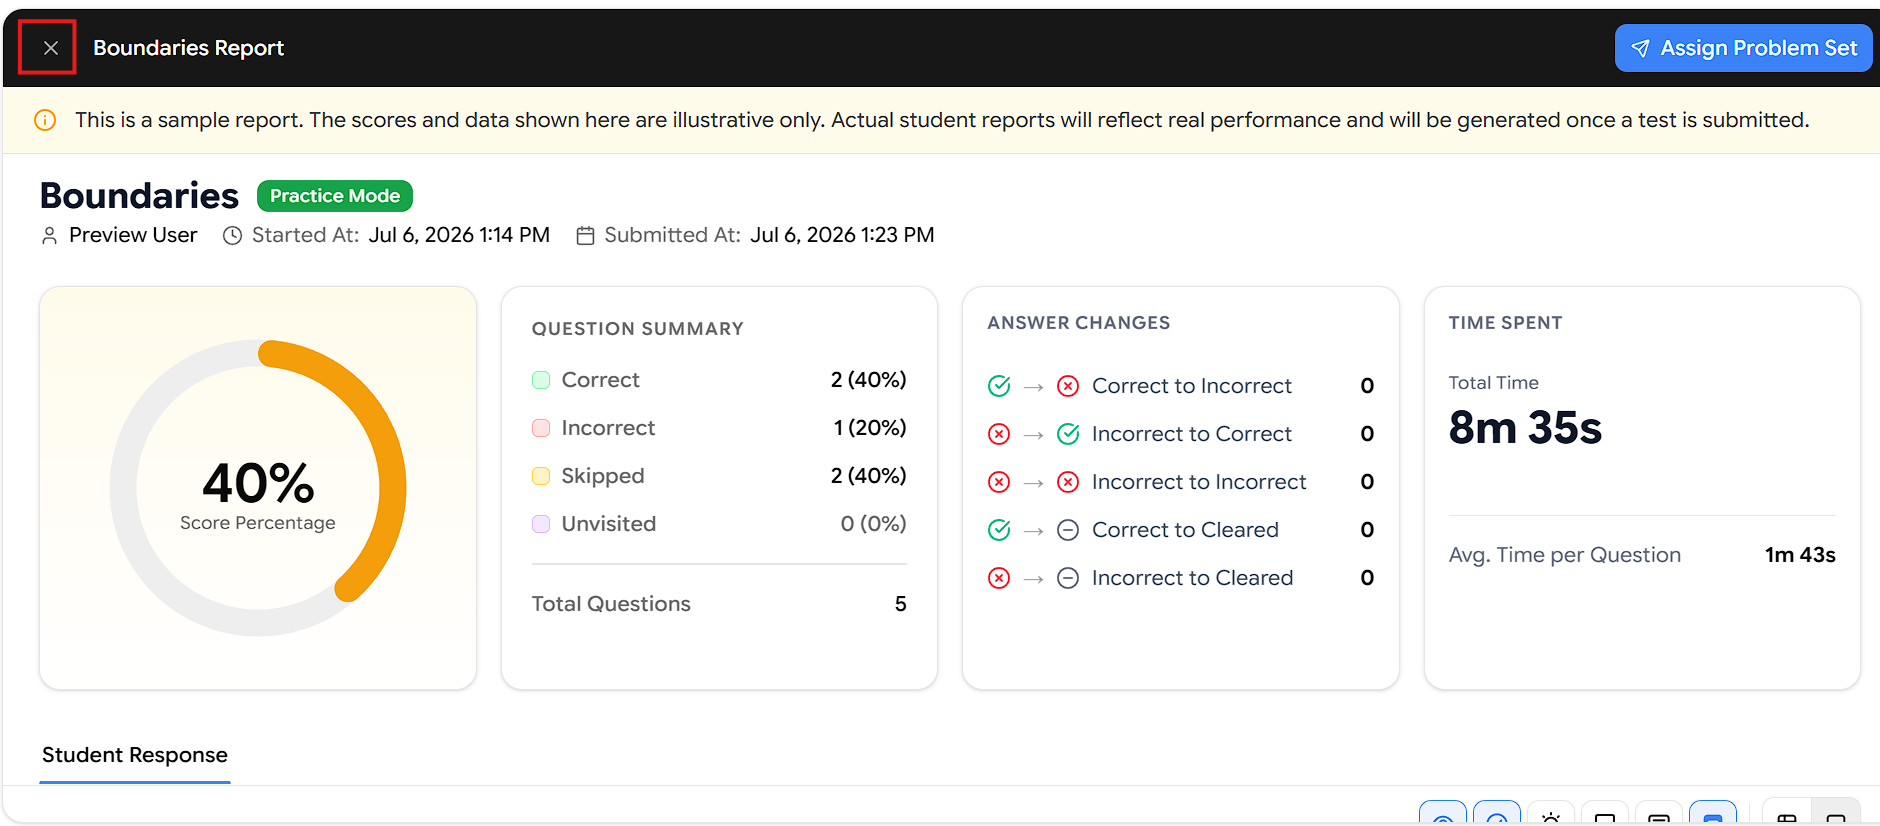
Tip: You don't have to leave the report to assign it. The Assign Problem Set button in the top-right corner lets you assign the Problem Set to students directly from the preview.
Summary of the Full Preview Flow
Select the Program → Problem Sets → Click Preview → Confirm → System Check → Start Preview → Answer Questions → End Test → Review Sample Report → Back to Problem Sets